Wow, that’s a mouthful, right? And, what’s a “vacuum assist boost pump” anyway? Read on, and I’ll explain what the part is, why it’s on the trucks, and how to replace one if yours has gone bad. It’s really quite simple, and anyone with a basic set of hand tools and a half hour to spare can do the repair themselves.
With turbocharged engines, there are certain instances – a cold engine first thing in the morning – where the engine simply doesn’t make enough vacuum to run the power brake booster. If you’ve got a vehicle built after the 1960’s, chances are you’ve got power brakes, and the booster for those brakes runs off of vacuum from the engine. But with a turbocharged engine, that vacuum doesn’t exist all the time it normally would without a turbocharger.
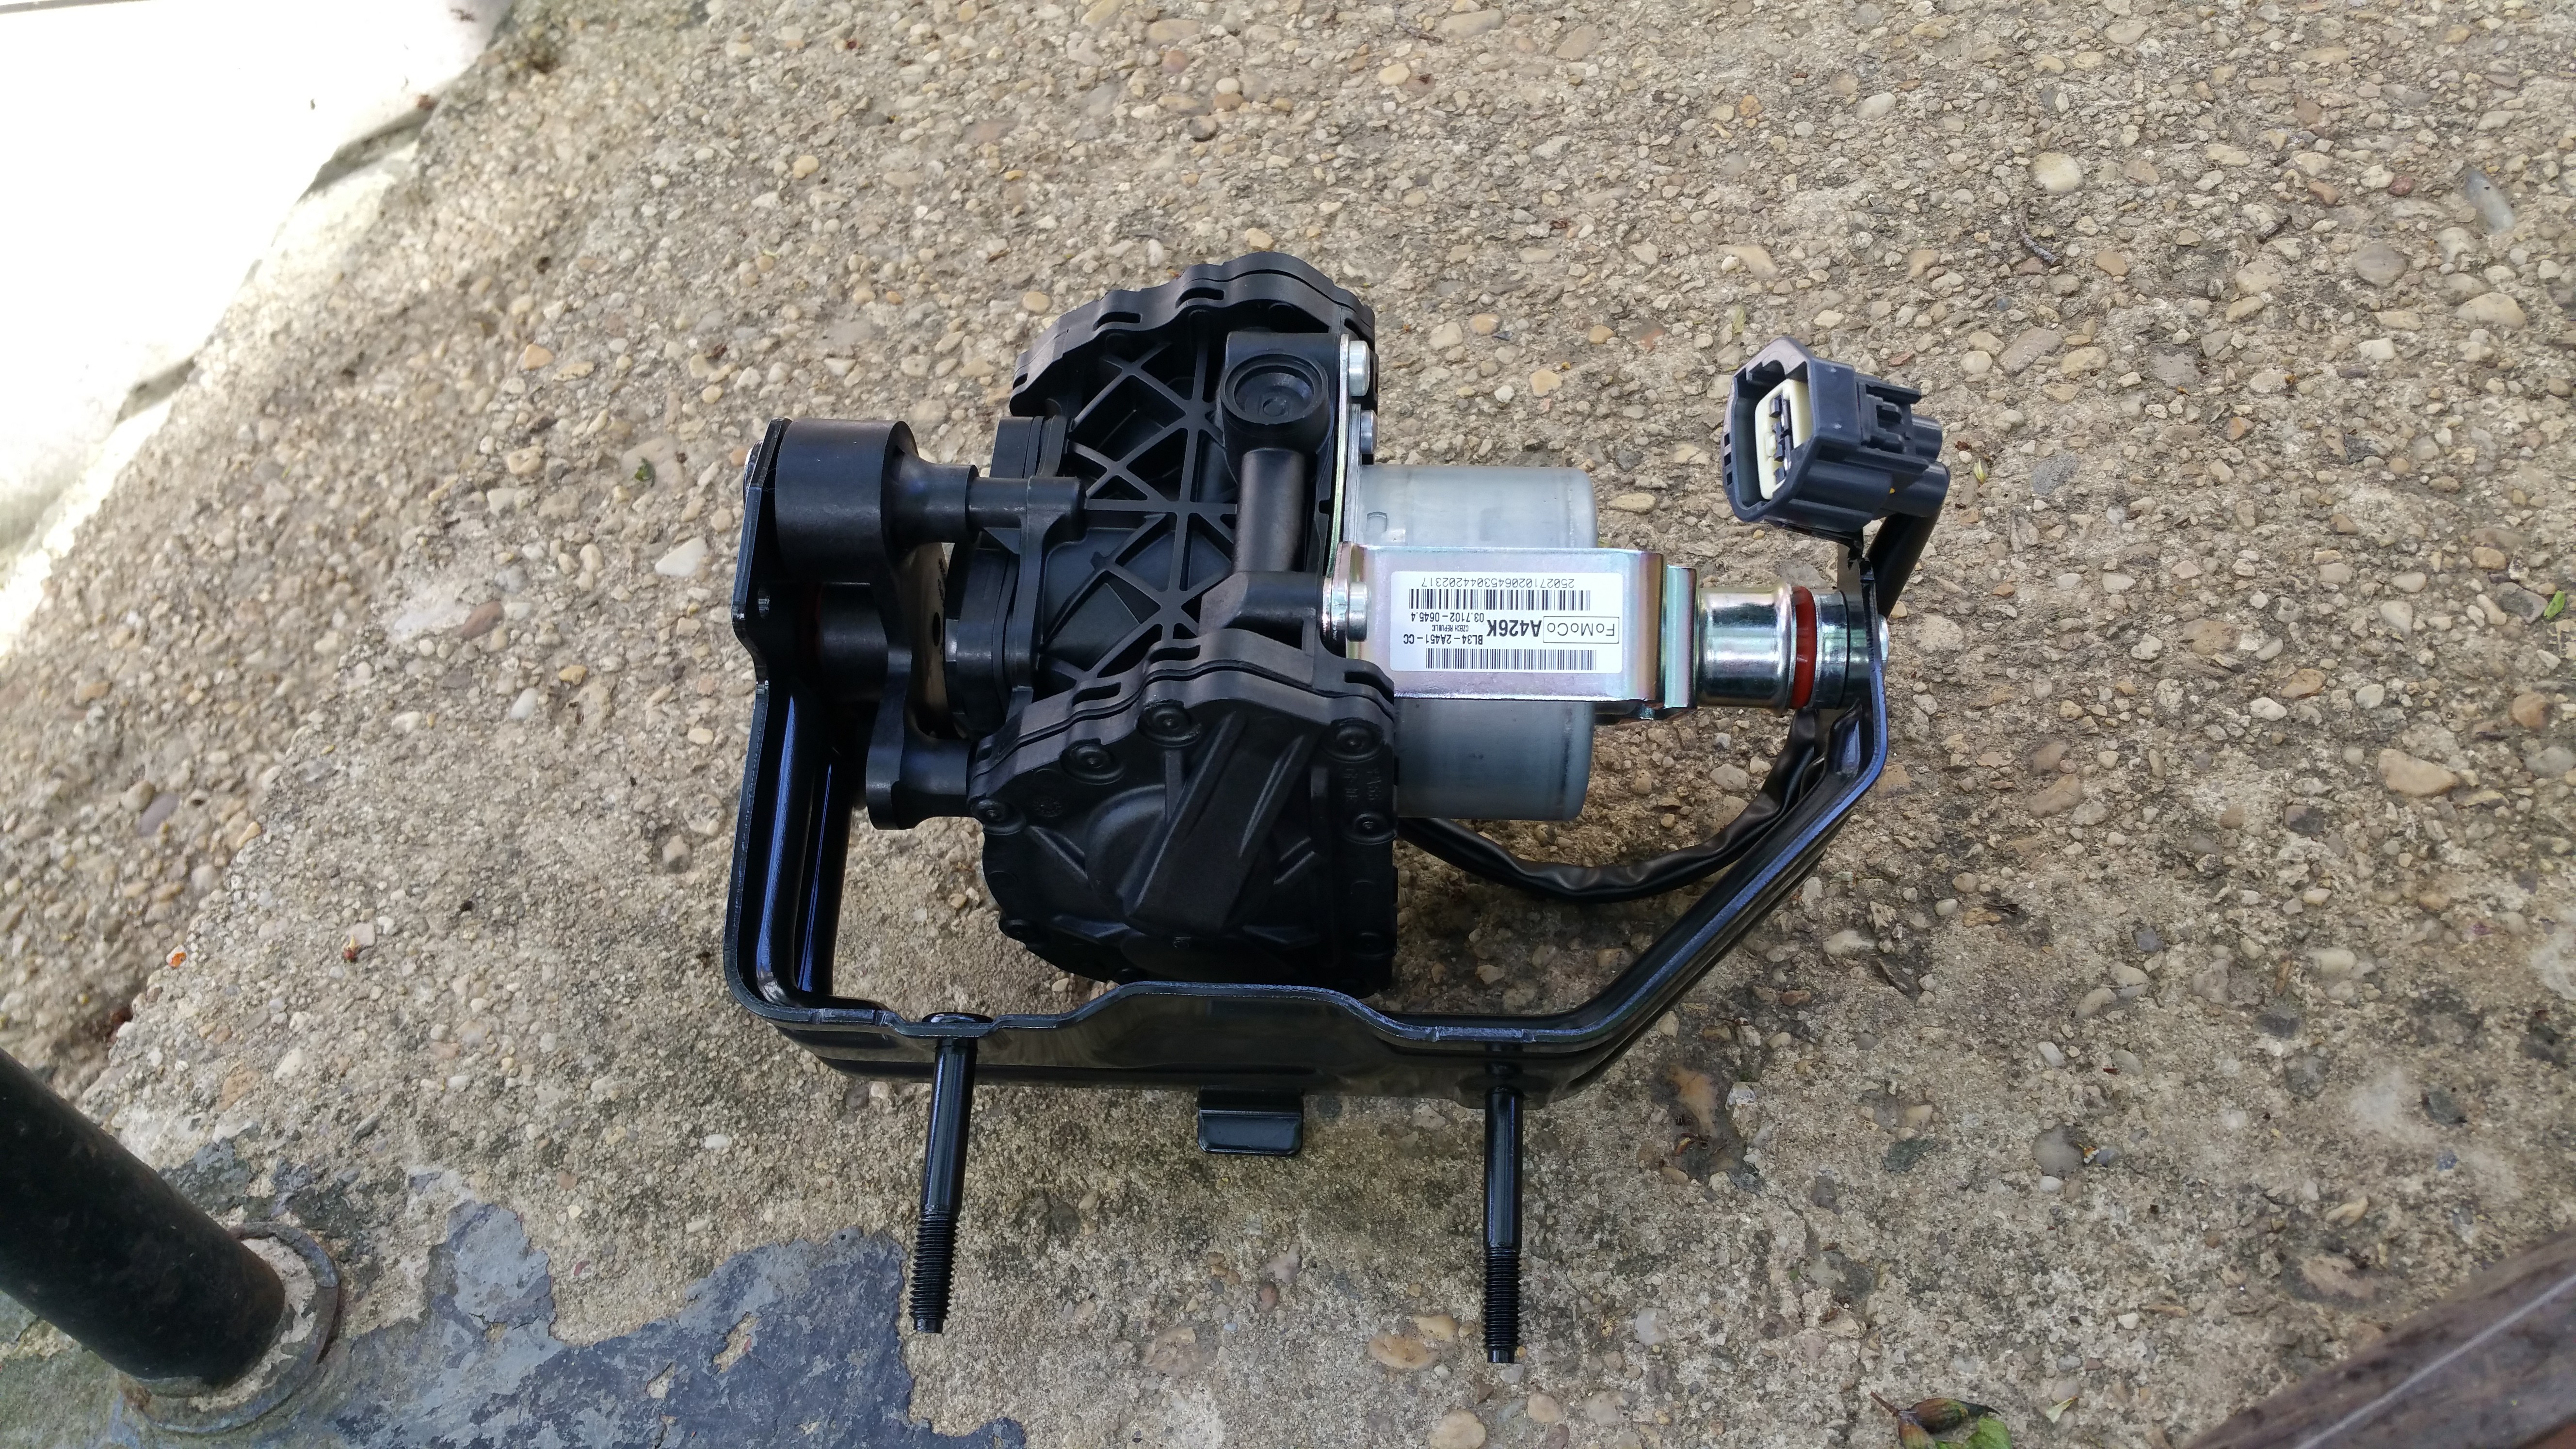
Insert the vacuum assist boost pump.
It’s an electric or mechanically-driven pump that creates vacuum for the power brakes. In the case of the Ford F-150 EcoBoost, from 2011 to 2012, that pump was electric, and housed behind the driver’s side headlamp. Apparently seeing their mistake, the engineers at Ford changed the pump out for a mechanical one run off of the engine itself, for 2013-2014 trucks. If you’ve got another Ford EcoBoost-powered vehicle, chances are you already have a mechanical pump, since that seems to be how the company built the rest of its vehicles.
So what happens when the pump goes bad? You get manual brakes, that’s what. Try that on a 6,000lb truck and let me know how that works out. I ended up half in the street in front of my home, the first time the pump failed on my truck. Hence why I parked the truck for a couple of weeks while I sourced the part. While it lists for close to $600, plus labor, I found that the exact OEM part I needed on eBay for less than $350, shipped. That, and a YouTube video explaining just how to replace the part, was all the convincing I needed to do the repair myself.
Oh, and the NHTSA recently announced it was investigating the 2011-2012 Ford F-150s for exactly this problem.
So, let’s get down to the business of replacing the bad part.
Step 1: Remove the Driver’s Side Headlamp
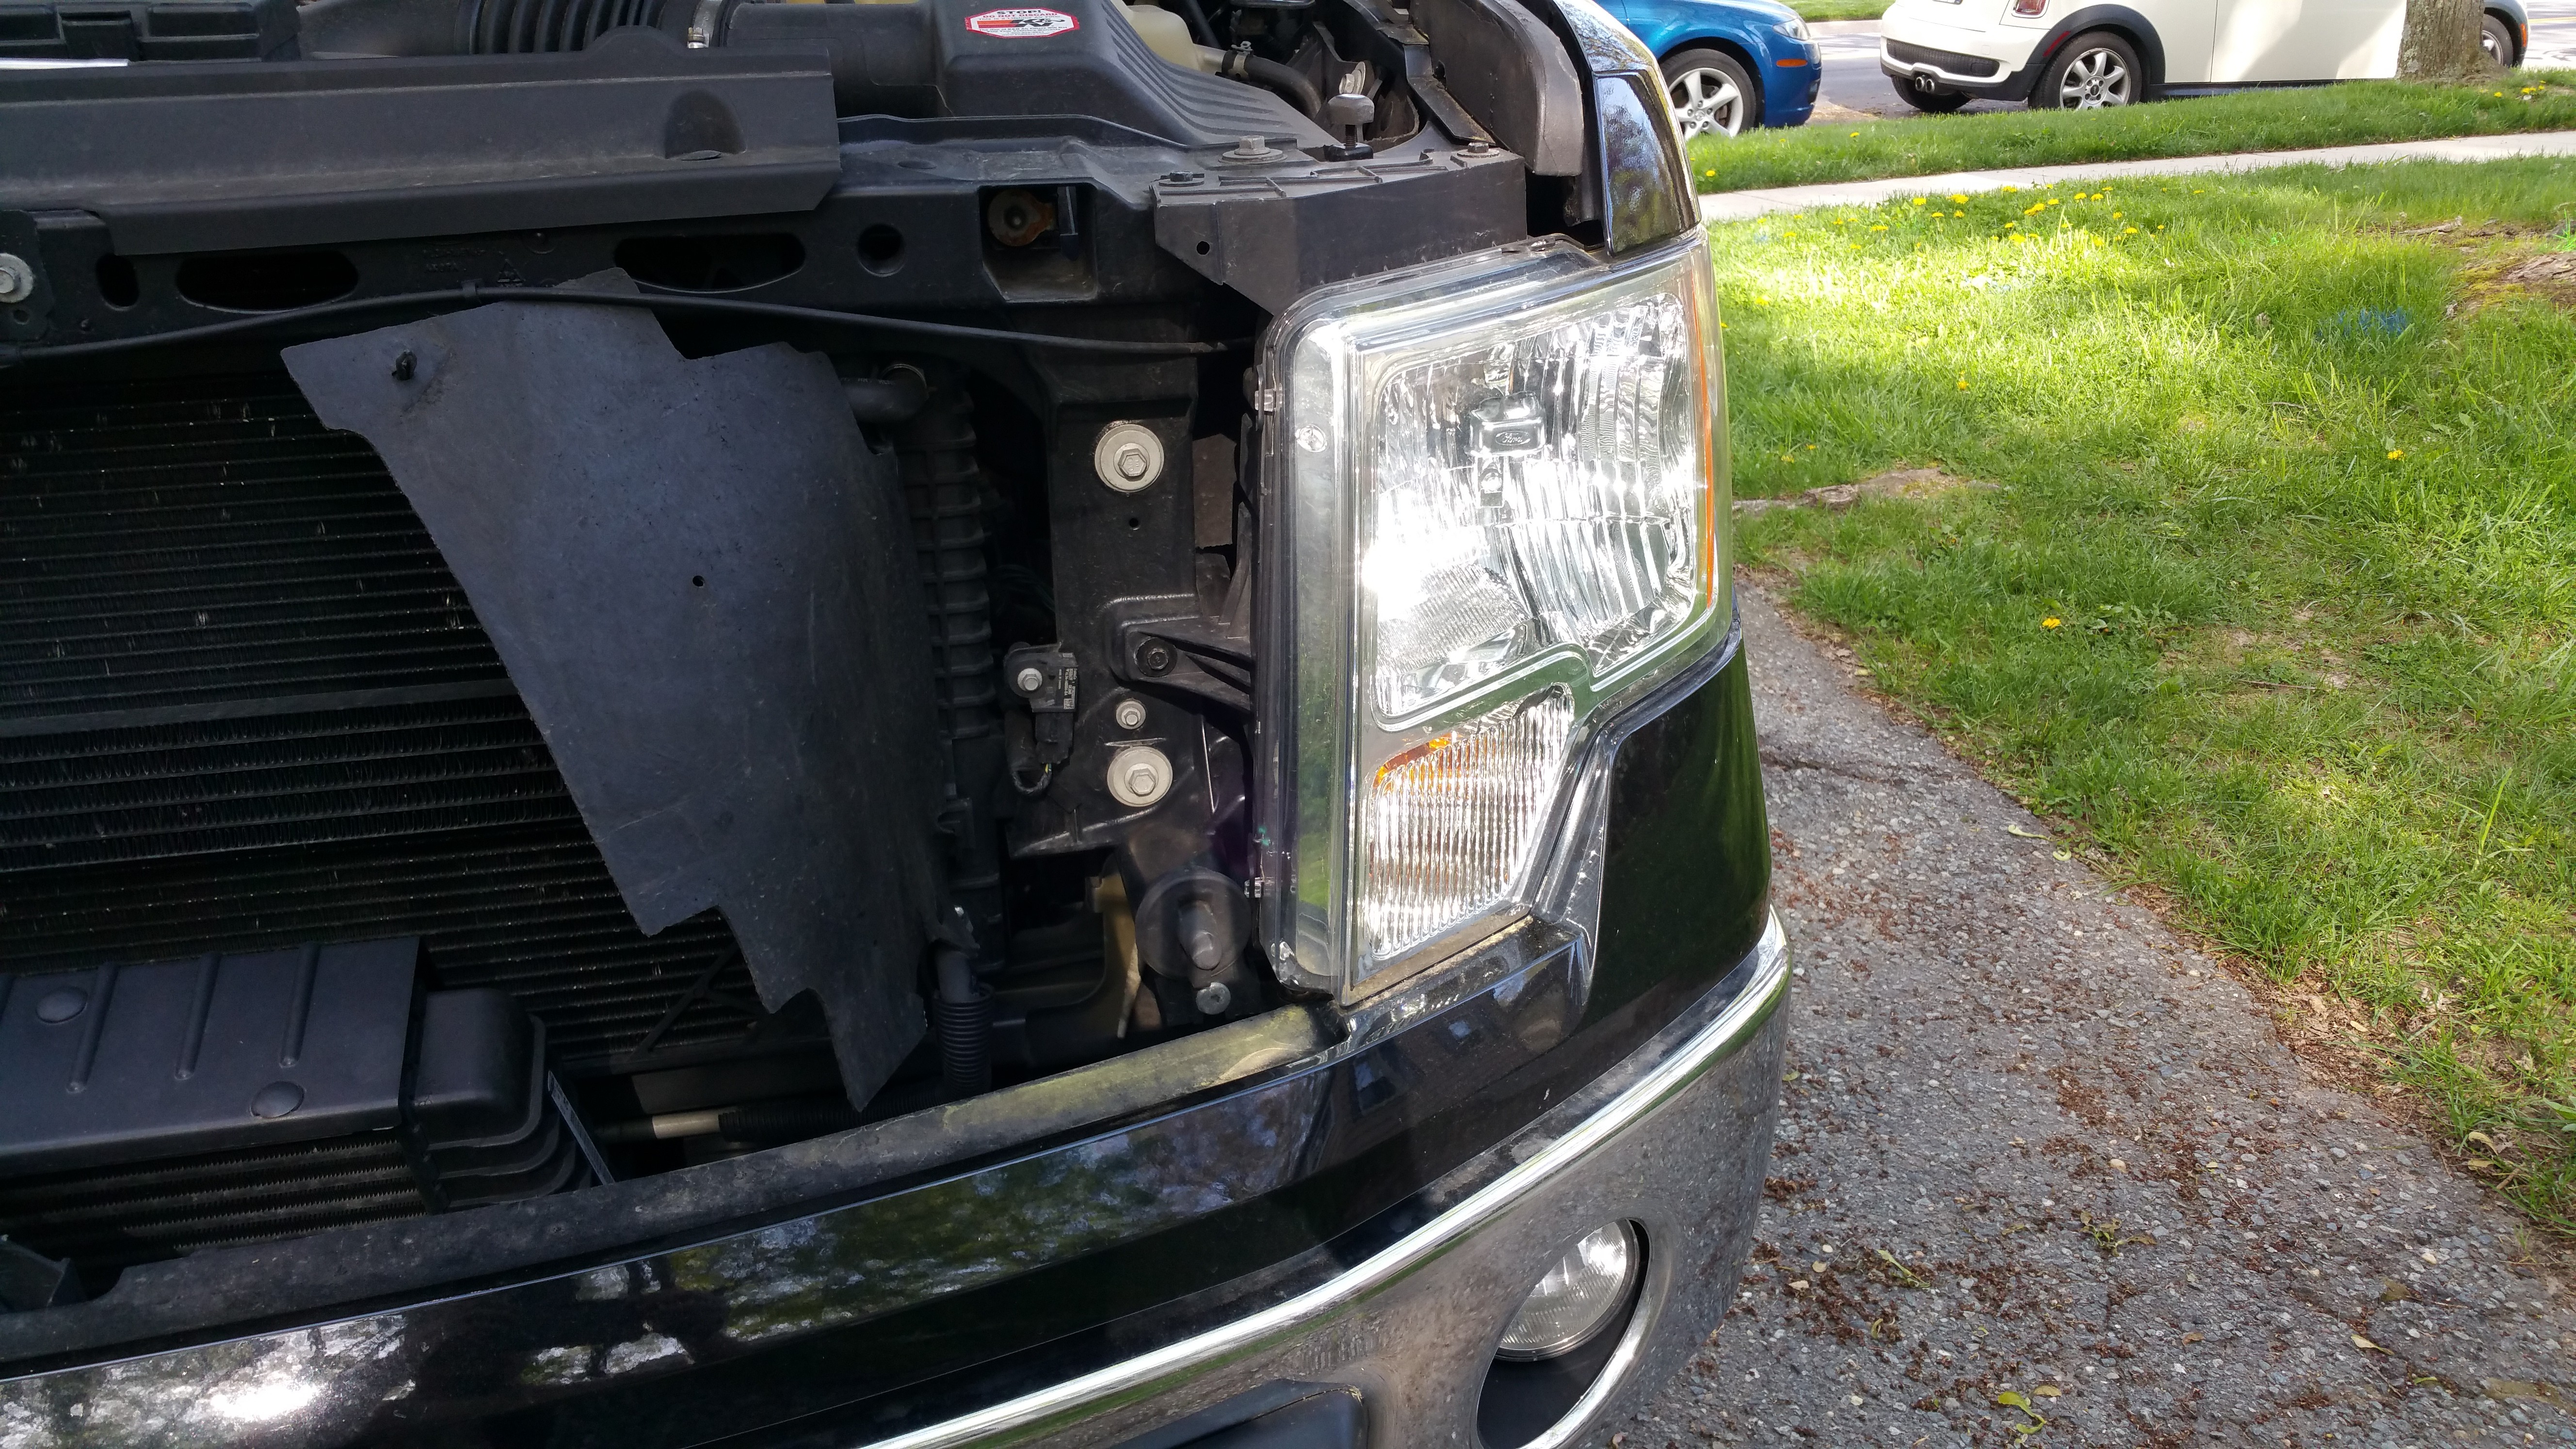 Start by opening the hood, and unscrewing the one clip that holds the rubber shroud between the headlamp and radiator. Now, tuck that the shroud up and to the left, out of the way.
Now you have access to the 3 screws you need to remove in order to remove the headlamp enclosure. They’re each 10mm, and there’s one in the front (where the shroud was) and two on top.
 Once you have those 3 screws removed, the whole enclosure will come out. It’s got clips on the right side, so take your time and use a little patience so you don’t break any tabs. It’ll take some wiggling and pulling to get the enclosure loose. Don’t pull it too far away, however, as the wiring harness is still attached to it.
There are 3 individual bulbs in the enclosure, so remove the clips on each one of the three, and then the enclosure is free and clear. Set it aside, careful not to scratch the lens part of the housing.
Step 2: Remove the Original Pump
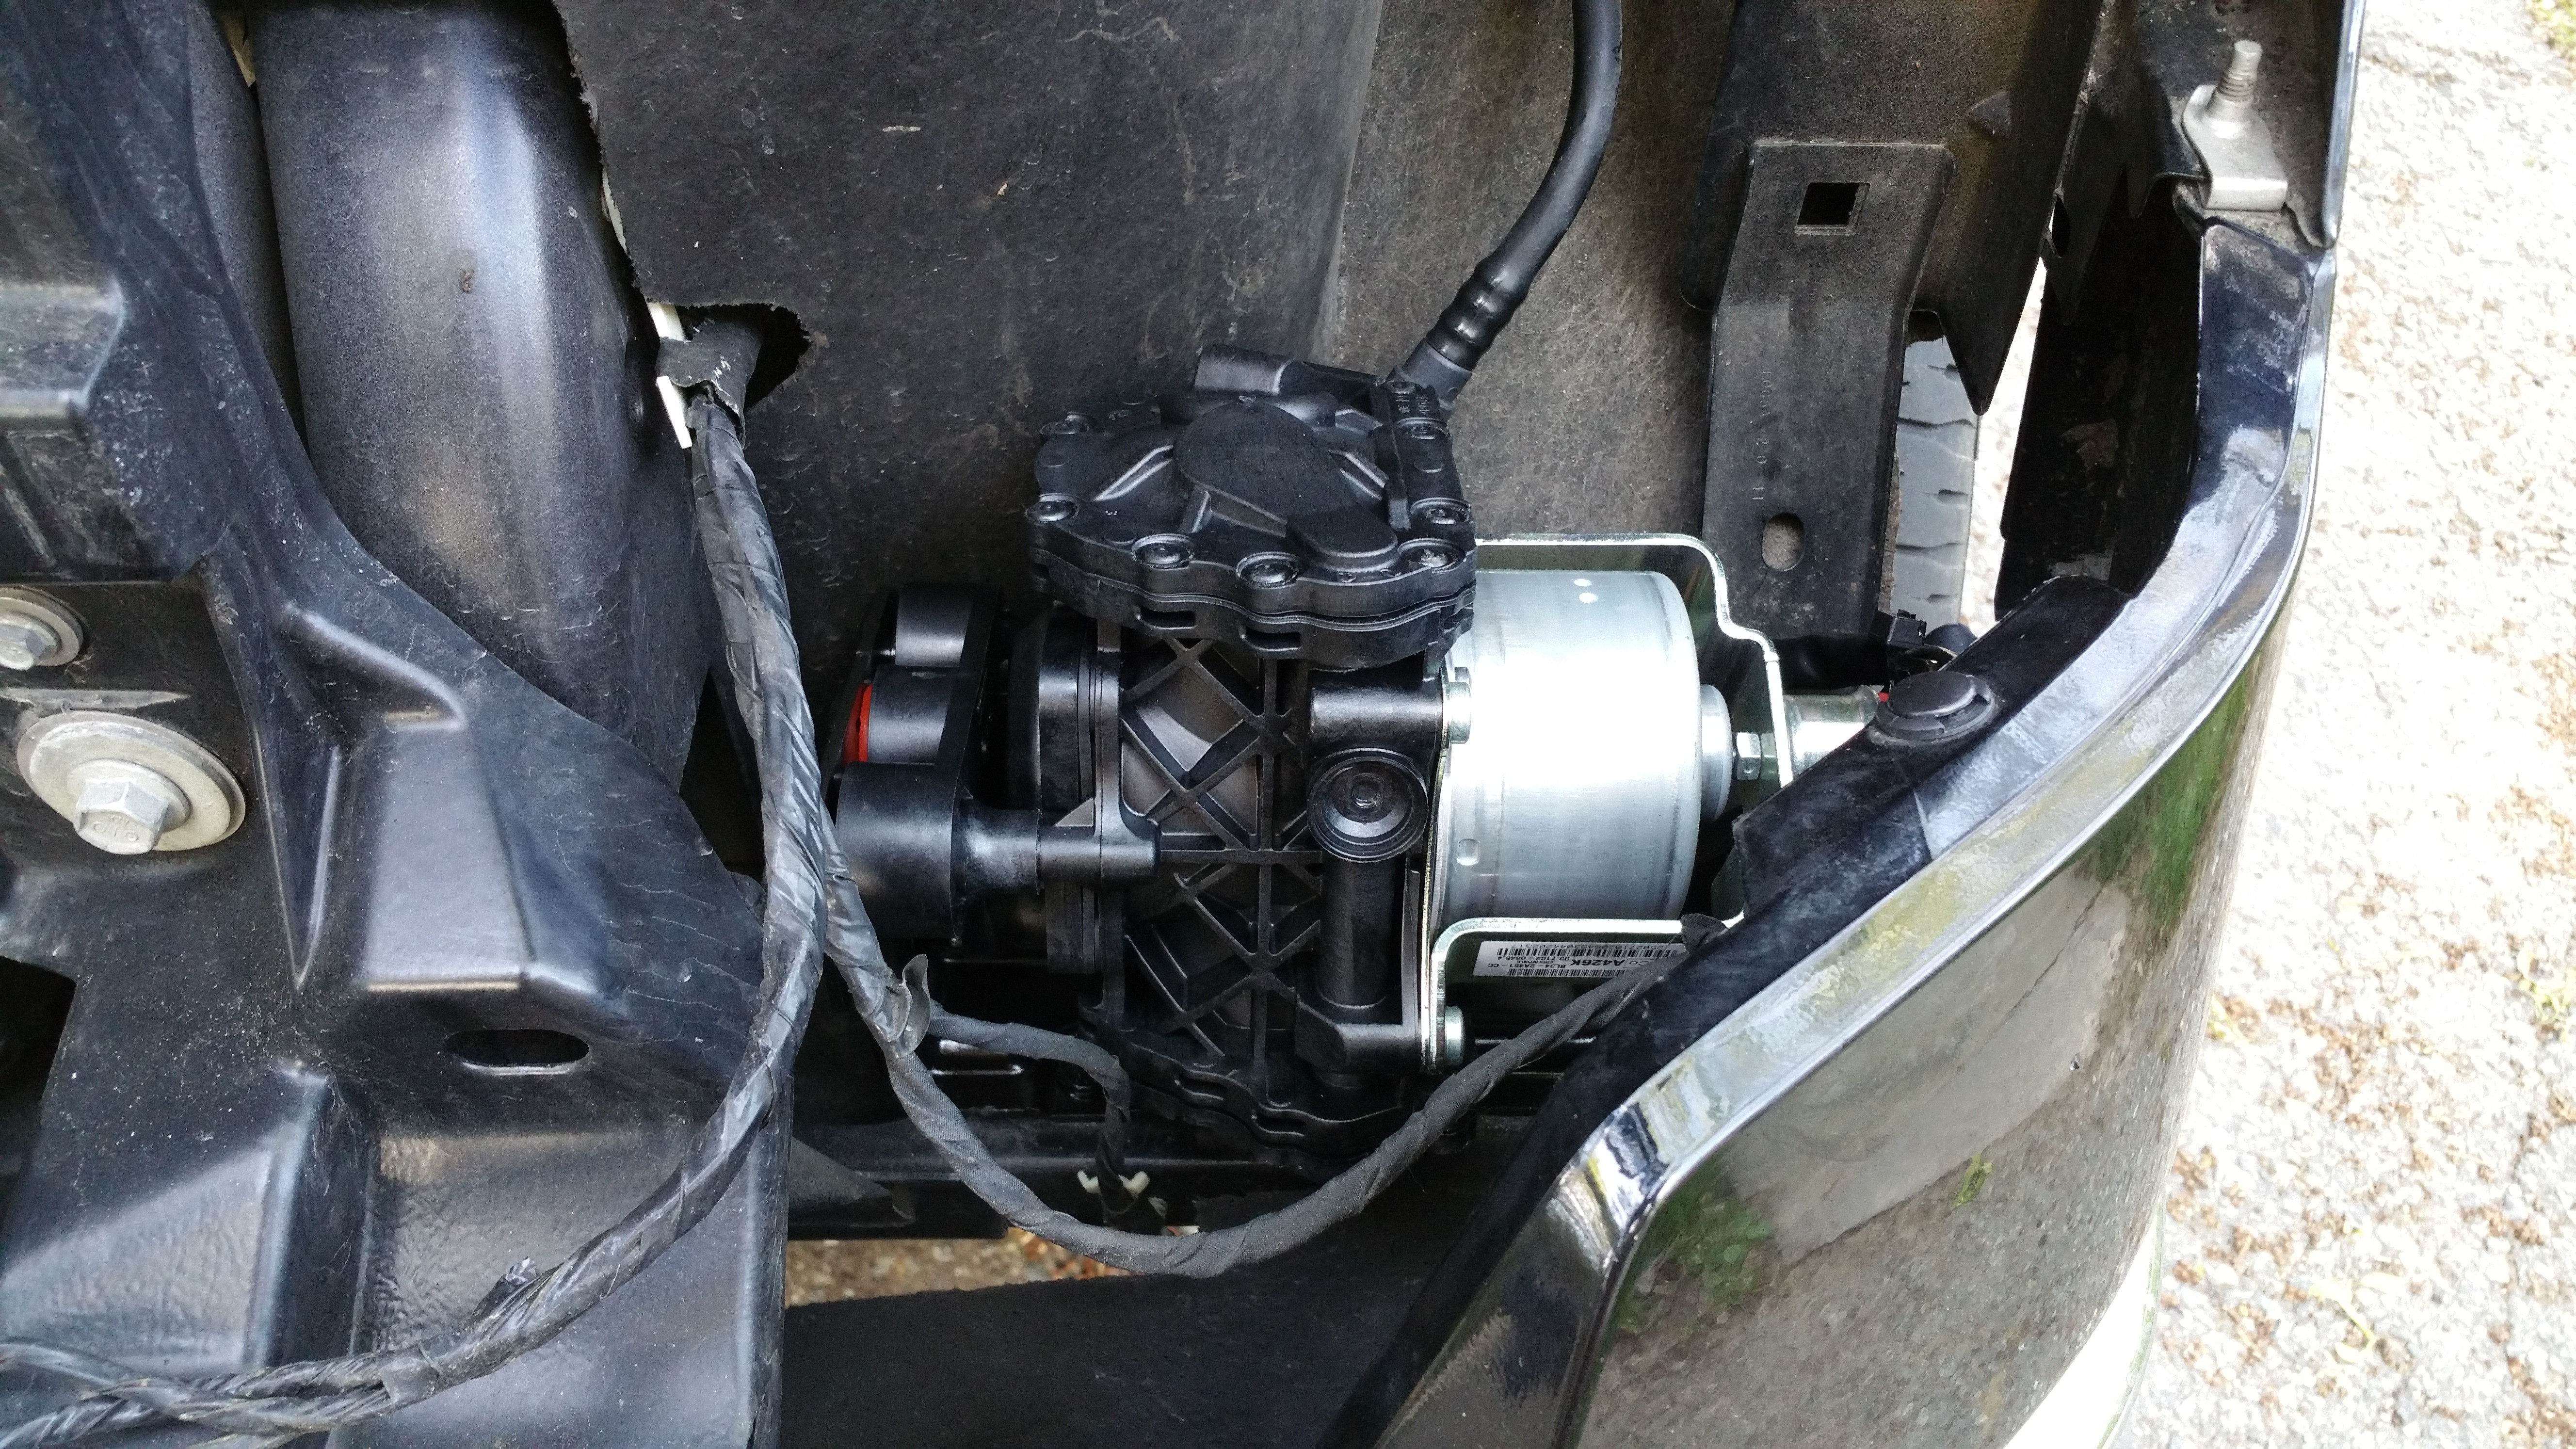 Now that you’ve removed the headlamp enclosure, the actual pump is right in front of you. It’s held in by two studs on the bottom of its mounting bracket, which is included as part of the replacement package. It also has a vacuum line and an electrical connection.
 Start by removing the electrical connection on the right-hand side of the pump, and then the vacuum line. The electrical connection is clipped to the pump’s mounting bracket, so disconnect that first. The wires will easily disconnect.
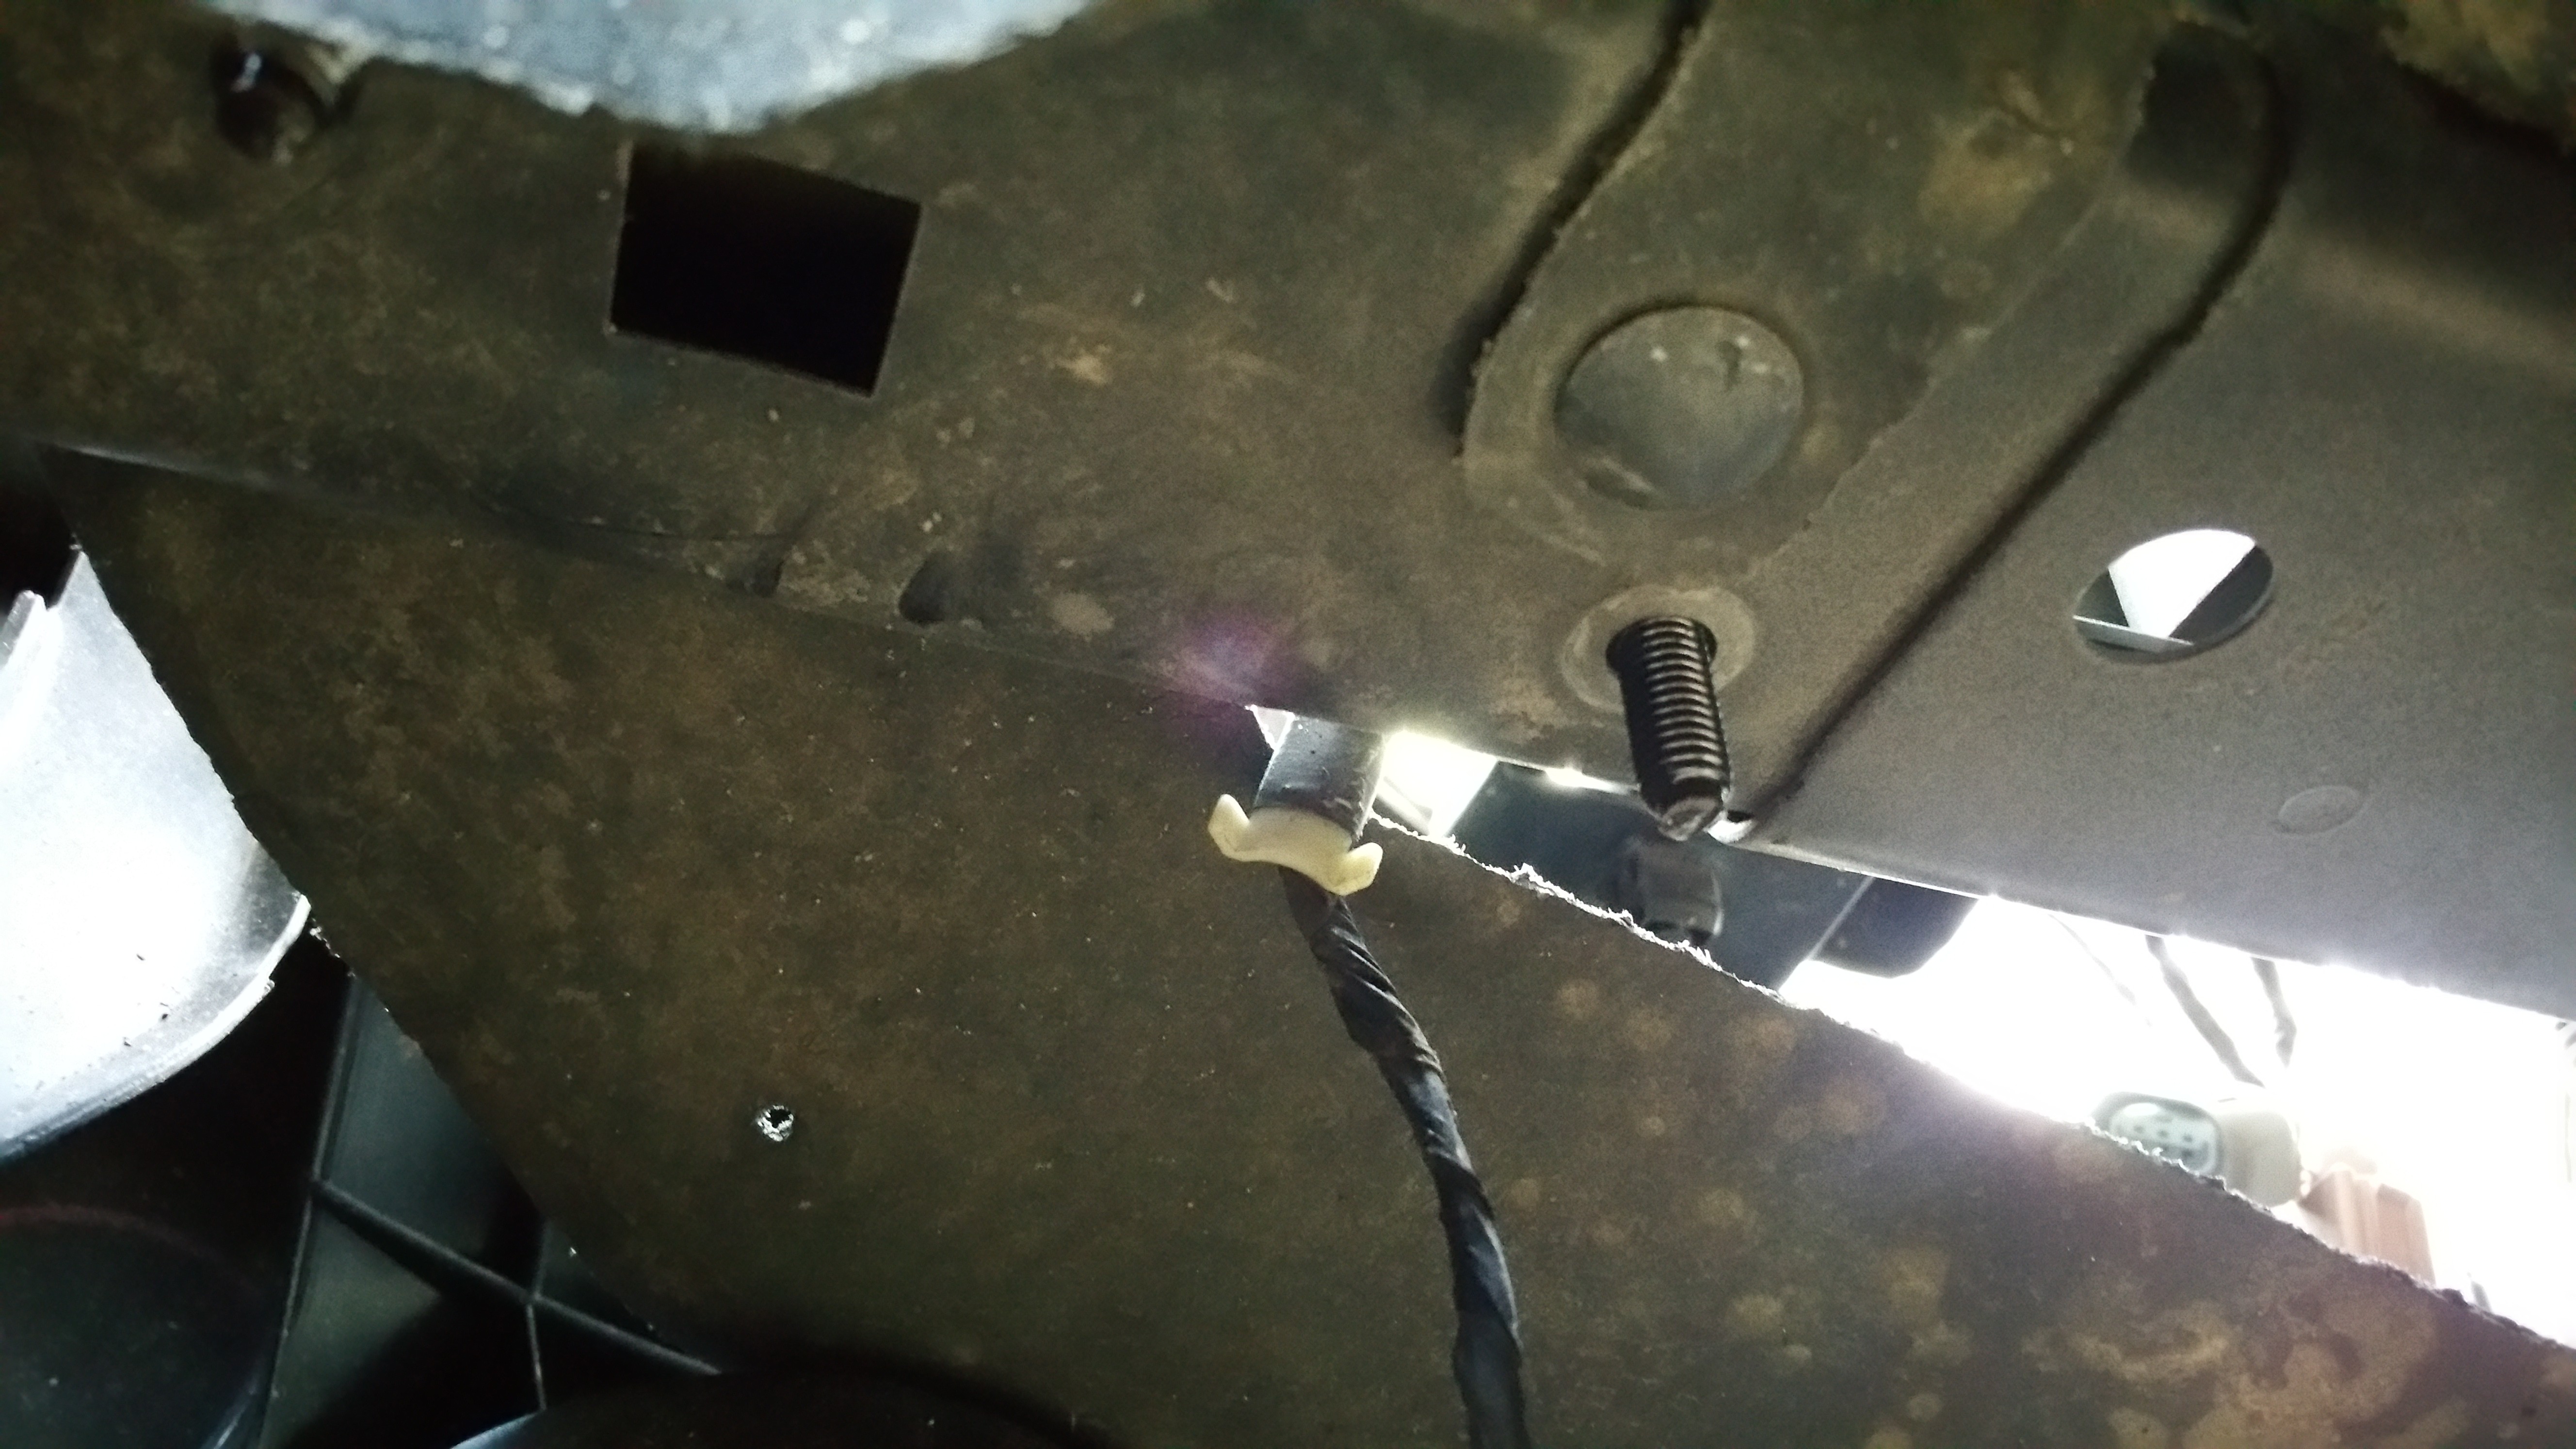 Then, go underneath the truck, locate the two studs, and remove the 13mm nuts that hold them in place.
 Now, you can lift the pump up and out of the truck.
Steps 3 and 4: Replace the Pump
Install the new pump and button everything back up, in the reverse order of how it came out.
Step 5: Test Drive
After doing the install, I started the truck’s engine and let it idle a minute to see if any check engine lights came on, and none did. I then tested the brake pedal, in park, to ensure I had power brakes.
I followed this up by driving the truck a short distance at short speed to make sure nothing had gone wrong.
All went well for me, so I parked the truck for the night and smiled, knowing I’d saved myself a good chunk of money by doing the job myself.
Good luck with your repairs, and if you have any questions, let me know!
by John Suit
If your truck is a 2011/12 f150 Eco boost and is experiences issues with the electric vacuum pump it is in fact covered under extended warranty through Ford. Up to 240,000kms or 10 years!! If you’ve passed the kms then you have until July to get it in to be fixed under warranty. I found this out upon research and it is currently in the shop.
Scary af to have it go. Ugh! So just a heads up to any who may not know about this!!
Elisha, you’re right! Ford sent me a letter back in March, which I took to my dealer, and they sent me a check three months later for the cost of the part once I showed them the invoice from the seller.
-John