The R56 Mini Cooper S was sold in America for the 2007-2012 model years. It featured a turbocharged 1.6-liter 4-cylinder engine, producing over 170 horses and 180 foot-pounds of torque. That tiny turbocharged engine needs a lot of air, so its filter can get dirty quickly. Read on to see step-by-step directions to replace the air filter yourself.
If you’re like me, you’d really like to do some of your own maintenance. It helps you know how things work, and gives you a great sense of accomplishments when you’re done. I maintain my lawn equipment, and I make sure I clean and sharpen my chain saw after use. Some things aren’t worth my time (in my area, it’s usually less than $10 in labor to get an oil change or tire rotation done, so why bother?). In the case of the Mini’s engine air filter, the dealer wanted almost $50 for their technician to do the job. I looked under the hood and did some quick math, and realized that I could get it done just as quickly, without getting messy, so I asked the dealer to reset the “needs engine air filter” service interval, and while I purchased the air filter from them, I did the replacement at home.
This replacement job was easy, as everything is easy to get to. If you have torx bits in your toolbox, it should be a 10-minute job.
Step 1: Access the air filter box
The first thing to do is to find the Mini’s hood release latches. The first one is in the driver’s kick panel inside the car, next to the door hinge. Pull that and the hood pops up a couple inches. Next, reach under the lip of the hood on the right hand side and feel for the lever. Pull it towards yourself, and the hood will release completely, rising on its struts to a fairly vertical position. Now you can see the engine, headlights, and other underhood bits.
I mention the hood releases because unlike most cars, where the second hood release is in the center of the hood, the Mini engineers placed it off to the right (the driver’s side), making it hard for those not in the know to open the hood.
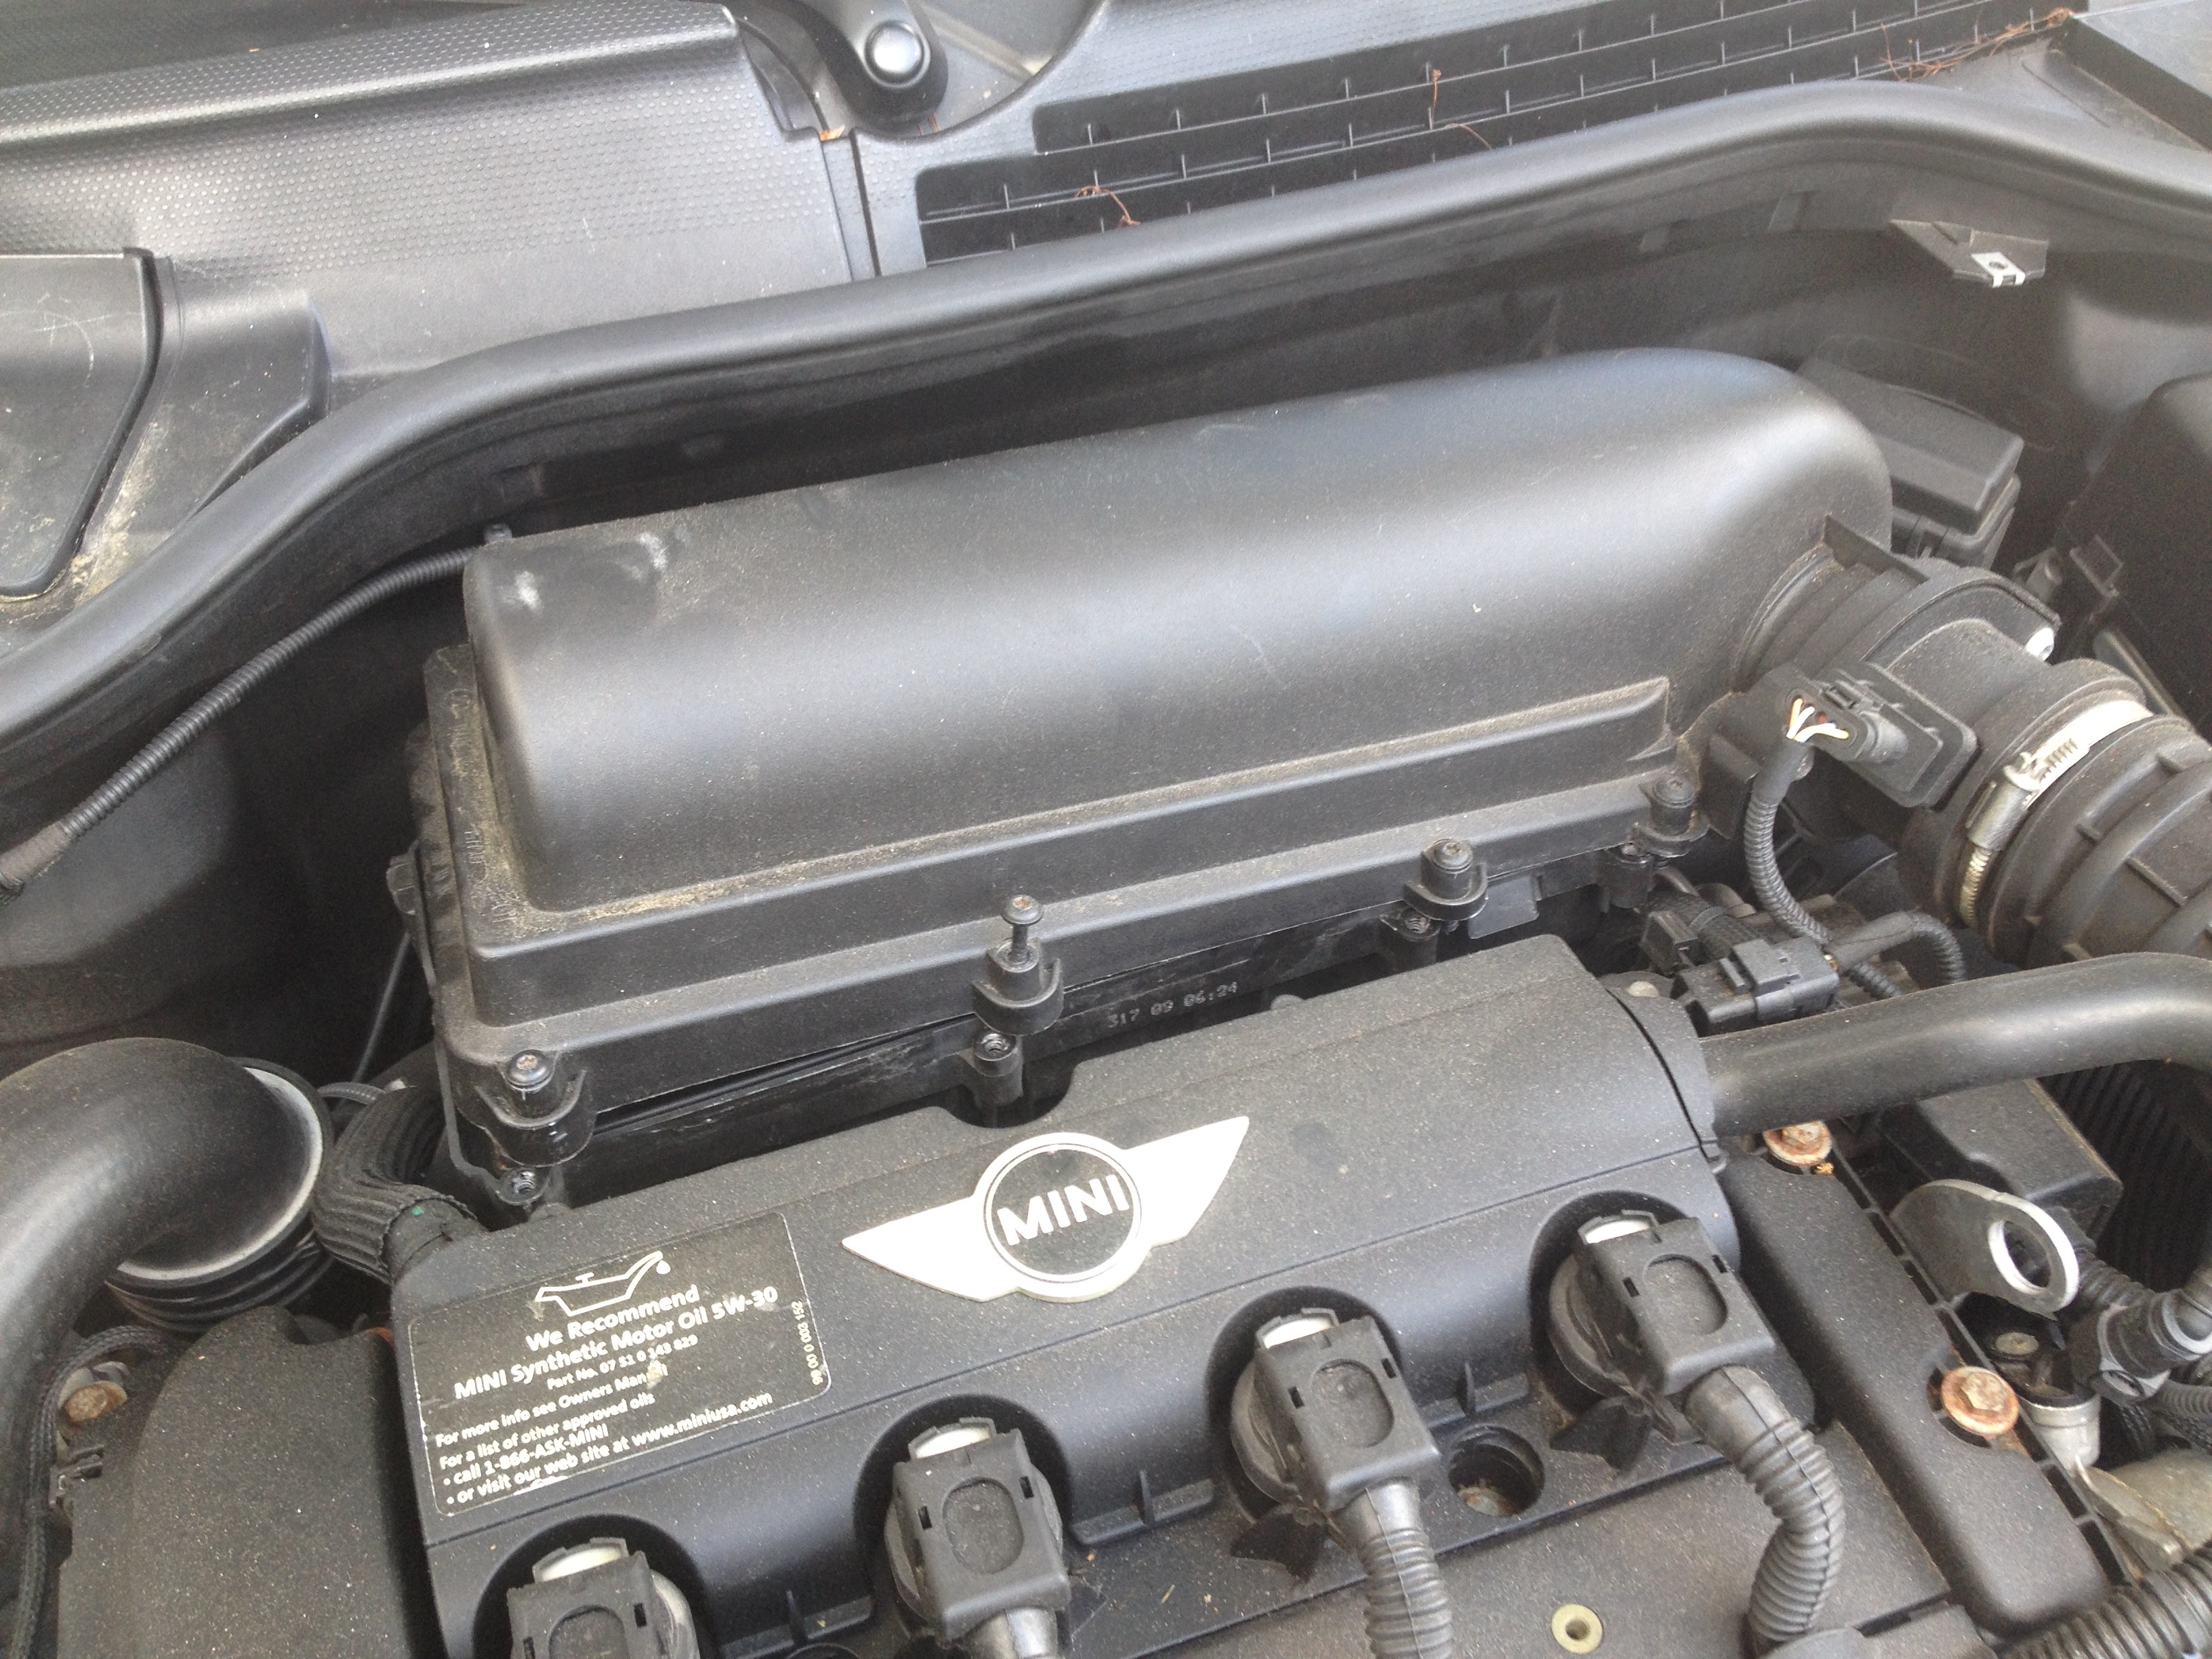
Step 2: Open the air filter box
Now that you’ve got access to the engine, you’ll notice a bulbous piece of plastic behind the Mini logo. That’s your engine air filter box. The top of it comes off, with four torx bolts in the front and a few tabs in the back. The tabs can be a pain, but luckily the torx bolts are “captured” in place, so you don’t have to remove them fully.
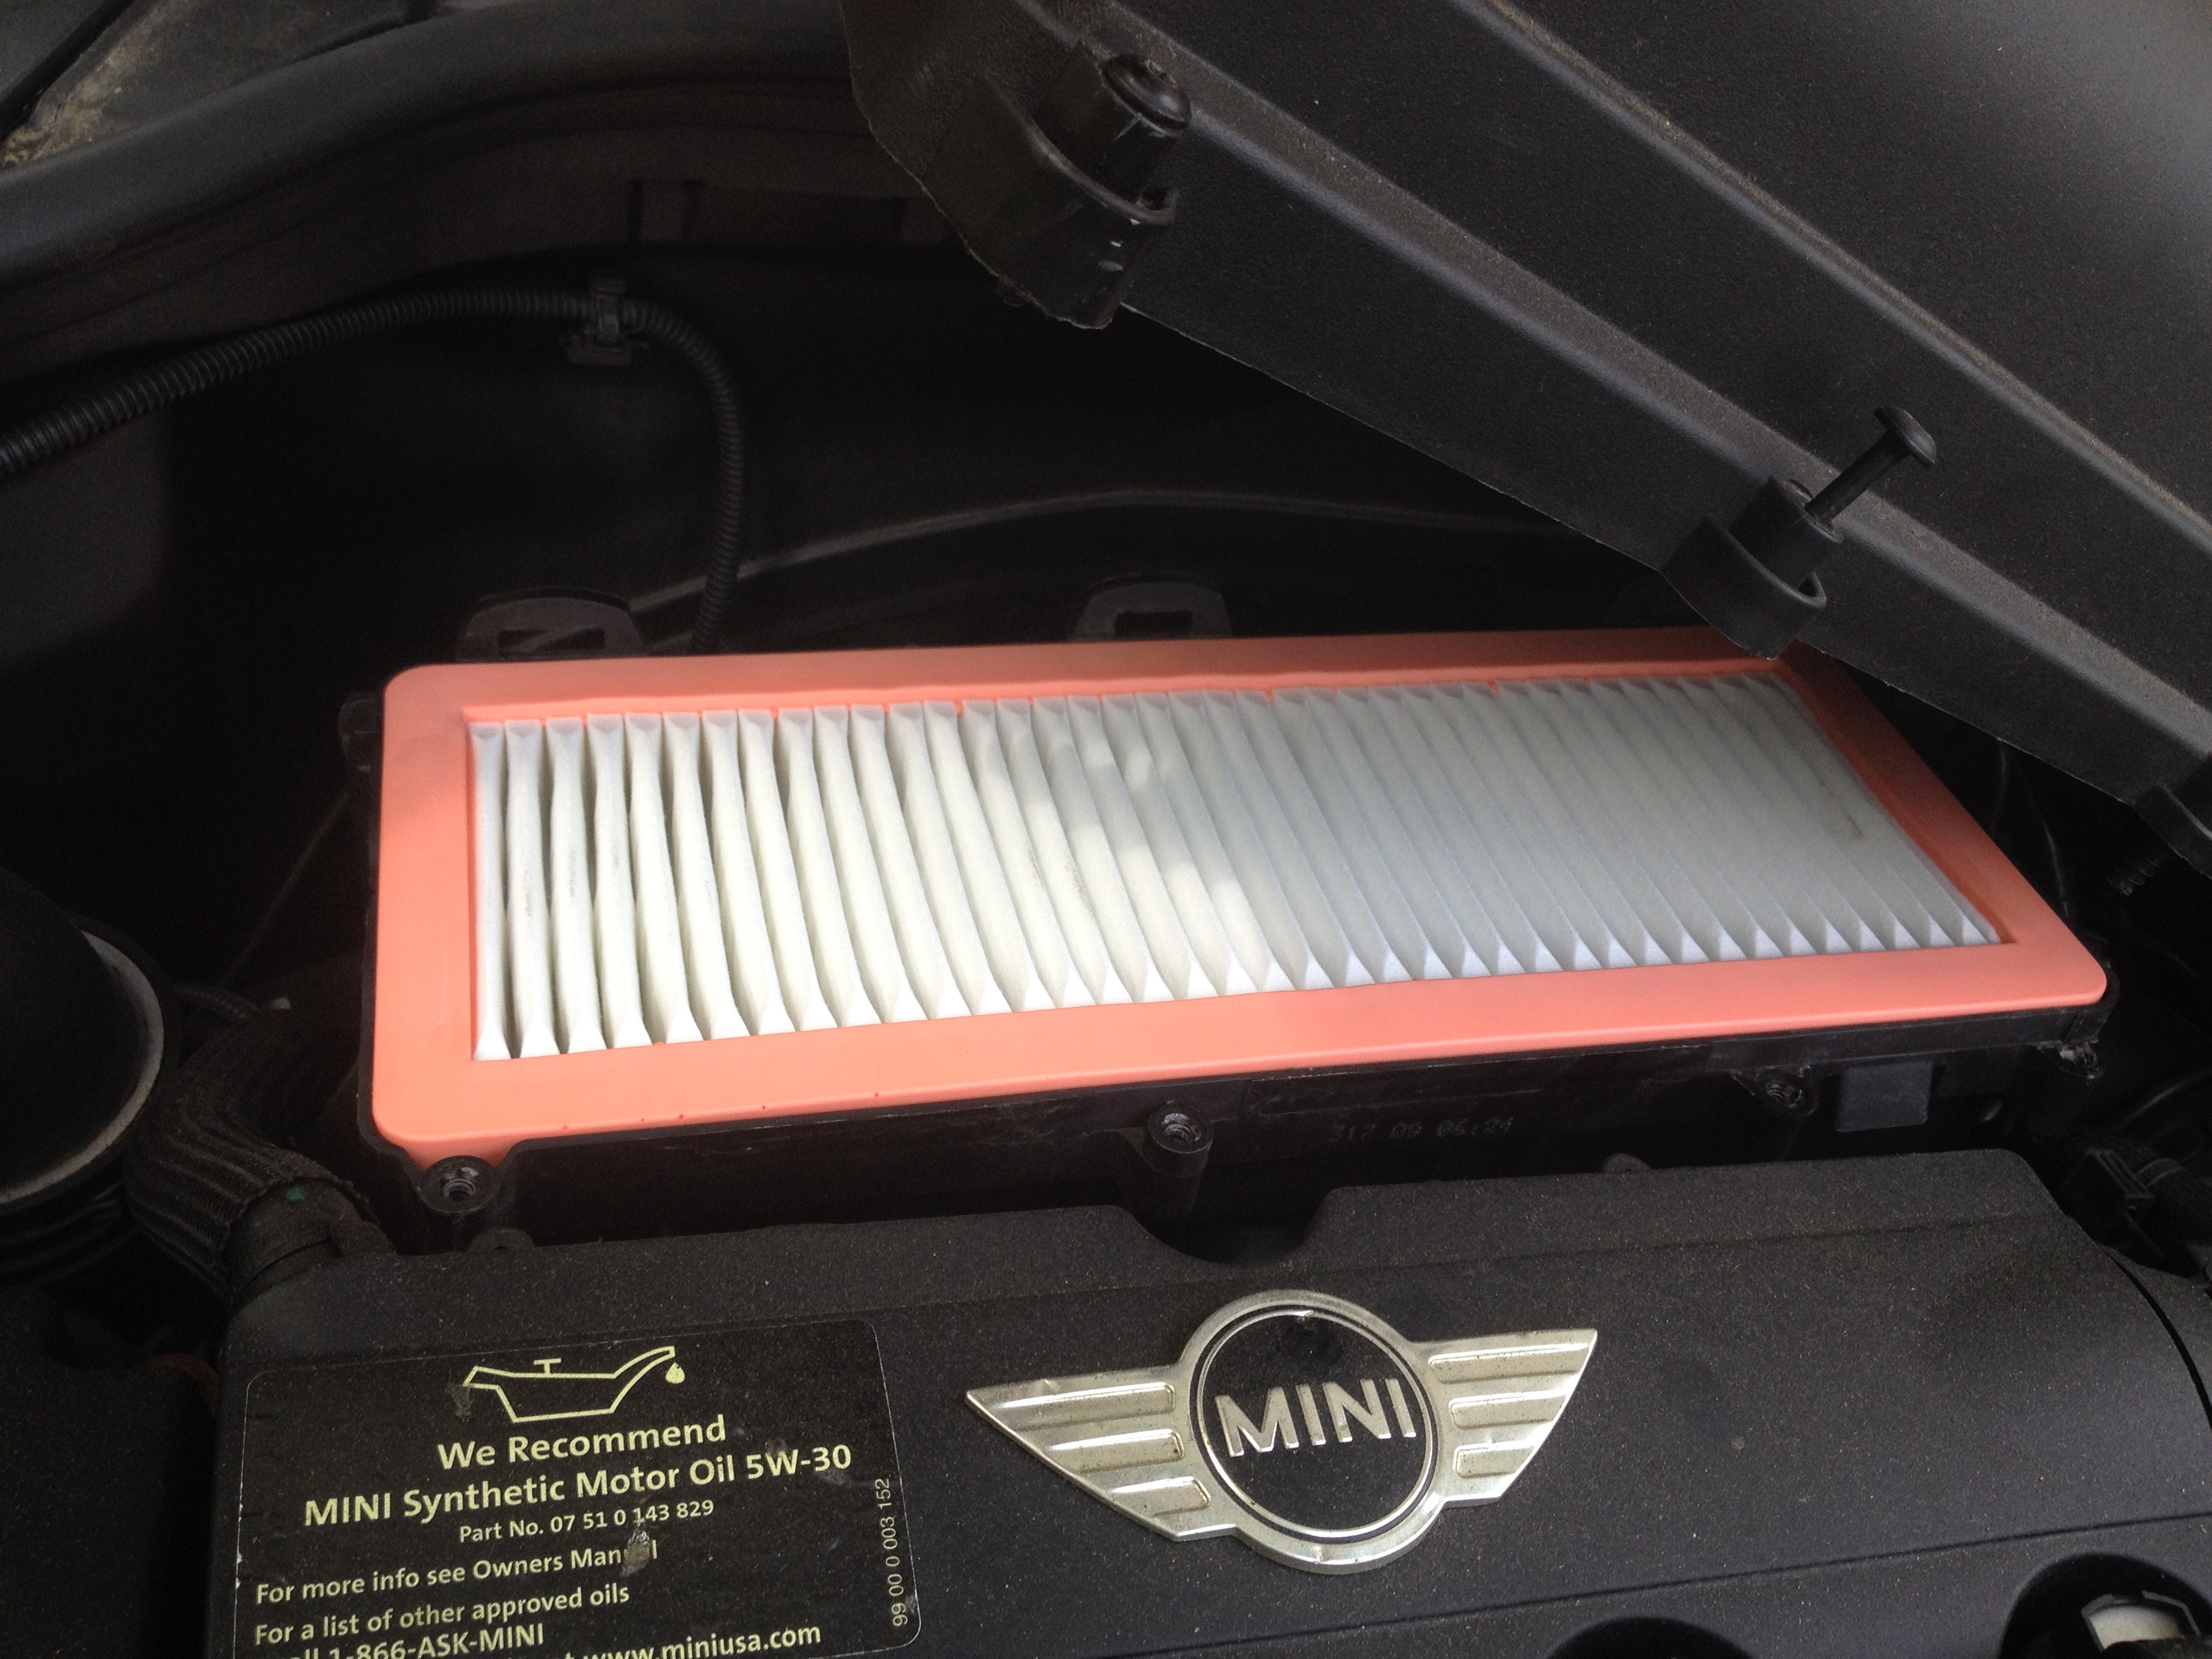
Step 3: Replace the filter
After you’ve removed the air filter cover, you’ll see the panel-style filter in its place. Remember how it goes, and put the new one in its place.
Step 4: Close the air box
Putting the cover back on is as easy as removing it, just start by inserting the tabs of the cover into the slots of the bottom half of the air box, and then tighten down the torx bolts. Don’t over tighten them, but they should be snug.
Now your Mini’s engine can breathe easy, and you can too, after saving enough to take two do a decent restaurant!
by John Suit