 The GoPro Hero cameras have been out for several years now, and have become popular with adrenaline junkies all over the world. While there are several dedicated dashboard cameras in use overseas, the options here in America are a bit constrained, to say the least. Since Washington, D.C.-area drivers do a lot of stupid things behind the wheel, I thought it’d be a great idea to run my own dash cam, so I started researching them, and ended up choosing the GoPro Hero3. Click past the jump for why, and my review of it. Keep in mind that I’m writing this review for the Hero3 with dash cam usage in mind. If you have any more questions about the Hero3, feel free to contact me!
In more than two months of research, several things became clear:
The most popular dash cams are Korean, Chinese or Taiwanese in origin.
A lot of dash cams are knock-offs.
Reliable vendors with warranties are few and far between.
Features vary wildly.
Video quality is hit or miss, to say the least.
Even a recent Jalopnik article helped prove that the last item mentioned above may be the most important, especially when you’re talking about spending $200 or more.
While the Hero3 doesn’t have a time/date stamp overlay on the video, nor does it come out of the box ready to be a dash cam, I chose it over its most popular rival in the US, the Contour Roam2. The reasons for this come down to Bluetooth versus WiFi, and overall presentation. The Contour Roam2 sounds like a great camera – very similar specifications to the Hero3, smaller overall size (it doesn’t require a case to be waterproof), color variations, to name a few positives. Then, I noticed that to control it with a smart phone required it to be paired via BlueTooth. Since I planned to use the camera in my truck, I wanted my phone to always pair with the truck, not the camera. Since my truck doesn’t provide a WiFi hotspot, I wouldn’t be losing anything to let my iPhone connect to the Hero3’s built-in WiFi. Recent update: it looks like Contour went out of business, as the Roam2 isn’t to be found anywhere.
I also liked the mounting system a little better, as well as the form factor and variety of cases. In the end, it was even simpler by being available to purchase at my local Target store. I wanted something that records at high quality, around $200, and would be able to be mounted in my truck and record for at least a few hours without needing a recharge.
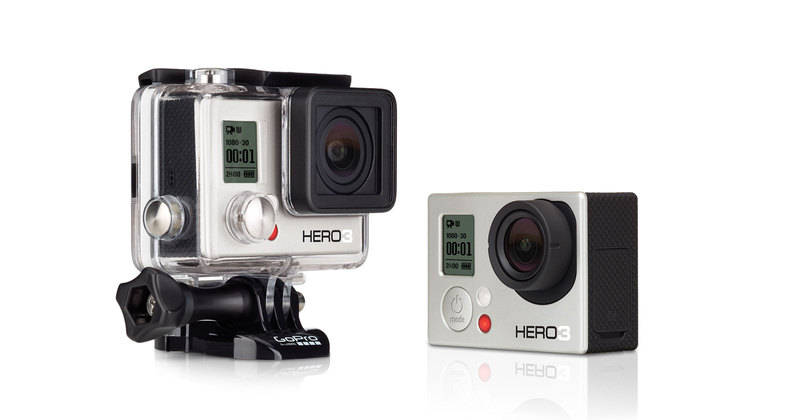
The GoPro Hero3 White Edition fit the bill best for those goals, with the option of being in a skeleton case which allows the car charger to be plugged in while it records – which I haven’t done yet, but will before long (look for more reviews on those accessories).
Along with the White Edition camera for $200, I picked up the Suction Cup Mount for $30, and a SanDisk 32gb MicroSD card for $54.99. All told, I was set up for less than $300, and could begin recording as soon as my grubby paws could remove my new toys from their packaging.
In order to be more “green,” GoPro ships their cameras sans manuals, with only a card leading you to a web site where you can download the user manual for whichever product you just purchased. I still prefer paper manuals, as they’re easier on my eyes to read, and easier to multitask with, especially when my computer is involved. Regardless, this was a minor annoyance. They also ship it with a card asking you to update the camera immediately. I did this, and it took quite a while because my MacBook Pro, which is only a few years old, won’t run Java 7, which is required by GoPro’s update software to perform an “Automatic” update. I chose the Manual way, which involved copying files to the camera and cycling its power, at which point it recognized the files and performed the update for me. Once I figured out why Automatic updates didn’t work, the rest of the process took about 10 minutes to finish.
A bigger annoyance is the ambiguity surrounding “looped recording,” or “looping recording,” depending on who you’re talking to. Looped recording is where a camera will record for a set number of minutes, and then create a new file, and begin recording in it, ad nauseum. When the on-board storage is full, the camera simply starts overwriting the oldest video file it has, and the cycle repeats. In the dash cam world, some cameras include G-sensors, which sense quick acceleration, turning or stopping, which usually signifies an “incident” – whether it be an accident, accident avoidance, or a stop light race. The G-sensor, in turn, tells the camera to lock the previous minute or so, so that it’s never overwritten.
While the Hero3 has looped recording, it works a little differently. There’s no G-sensor to tell the camera to save footage, so what it does, is record segments of video, up to the amount of time you specified – in the Hero3, that means (in minutes) 5, 20, 60, 120, or Max. That last setting, Max, means until the memory card is full. Once the specified time has been reached, the camera starts overwriting its oldest video files in that set. For clarity, let’s say you set the Hero3 to 5-minute looped recording. What you’d see after 3 minutes of recording, is 3 videos, 1 minute long each. After 7 minutes of recording, you’d see 5 videos, 1 minute long each, but it would be the last 5 minutes. For 20 minutes, there are 5 videos of 4 minutes in length, and for 120 minutes, there will be 8 videos each 15 minutes long. I haven’t tested the other lengths (60 and Max), but I expect something similar.
What happens if you’re using the GoPro as a dash cam, is that you either leave it in regular recording mode, in which case it will continue to record until you stop it or the memory card fills up, or you leave it in Looped mode, and in the case of any incident you wish to keep the footage of, you stop recording and start up again, creating a new set of videos of your desired total length.
Whew! Once you understand that one feature, the rest of it becomes simple.
The basic operation of the camera is pretty simple. There are only a few hard buttons and a small LCD screen on the Hero3, which allow you to operate it and change its settings. If you’ve got an iPhone or Android-based phone, you can download GoPro’s app, which allows you to do WiFi-based controlling of the camera. This includes a Preview mode, which displays what the camera sees (although it’s about 3 seconds behind the actual camera), Power On/Off, and change Settings on the camera. Using your smartphone is quite a bit easier than scrolling through menus on the tiny LCD screen on the camera, but the smartphone integration doesn’t allow you to change all of the settings, just the most often-needed ones.
The power button on the face of the camera works in conjunction with the shutter button on the camera’s top, to scroll, select, and modify the camera’s settings. Reading the manual will help in this regard. On the side of the camera is a WiFi button, which when pressed, turns WiFi on, and when held for 5 seconds, turns WiFi off. I’ve already had the WiFi crash on my several times, but nothing that a quick off/on cycle didn’t fix, and it barely registered as an annoyance.
So, now that the camera is set up, let the recording begin! The Hero3 has a setting by which the user can flip the video so that when it’s hung upside-down, say from a vehicle’s windshield, the resulting video won’t need to be rotated 180 degrees by editing software – the camera simply records it that way from the beginning. This was the first setting I changed, to make sure that dash cam video is recorded the way I wanted.
Other than that, I’ve tested both the 720p, at 30 frames per second (fps), and the 1080p at 30fps. Both seem quite good for sharing with the world, while the 1080p obviously has the advantage. For fast action, you may want to set the Hero3 at 720p-60fps. As far as space goes, opt for a bigger MicroSD card. At 1080p, you’ll get a little over 15 minutes of recording into 2GB. At 720p, that same 2GB gets you 26 minutes of recording. Coincidentally, 2GB is the Hero3’s file size limit, which GoPro cryptically says has something to do with the WiFi, even though you can’t play back videos over the WiFi connection.
I use a MacBook Pro for daily computing use, so I will also be using it to review and edit the videos coming off the Hero3. This means I don’t have to download (the admittedly popular) freeware some Hero3 users are using to edit their videos. Instead, what I’m left with is GoPro’s CineForm Studio, which is a free download from GoPro, or using Apple’s own iMovie, which has a Camera Import button. Beware though, if you don’t have a large hard drive. The videos simply balloon when being converted from MP4 format to something an editor can read (in my case, .MOV). A 2GB video goes all the way to 15.5GB on my hard drive.
After import, editing with iMovie is a headache, at least until you figure it out. I’ll leave the explaining of iMovie to people much more well-versed in it than I.
The result of my very first foray into dash cam recording can be seen below. Be sure and select “720p” as the playback resolution, otherwise you’ll be losing out on just how well the GoPro Hero3 records.
by John Suit
Image Source: GoPro