
 My 2011 Ford F-150 has now been in my possession for a full 18 months. In this time, it’s seen its fair share of hauling duties as well as plenty of road trips, and in the case of the last 3 months, it saw both in the span of a week! Let’s dive right in and see where things stand.
![]()
Stats:
Time Period: 1/19/2013 – 4/18/2013
Miles Driven: 2,939 / 15,655 (this update / total) (2,005 in last update)
Average MPG: 17.0 mpg (reported by on-board computer)
Costs:
Maintenance Costs: $45.75 (oil change, tire rotation at a local Ford dealer)
Total Cost (non-fuel): $105.75
Services Performed:
- 14,675 – $45.75 – Oil change, tire rotation (at local Ford Dealer). The technician who performed the work stated that the oil looked a little dark, and instructed me to bring it in at 5,000 mile intervals instead of the current 7,500 mile intervals I am currently keeping. As a side note, the OLMS (Oil Life Monitoring System) is programmed into the truck and is set to remind owners to get their oil changed either once a year or when the percentage of oil life left is low, a value it calculates itself, which apparently isn’t frequent enough for my truck.
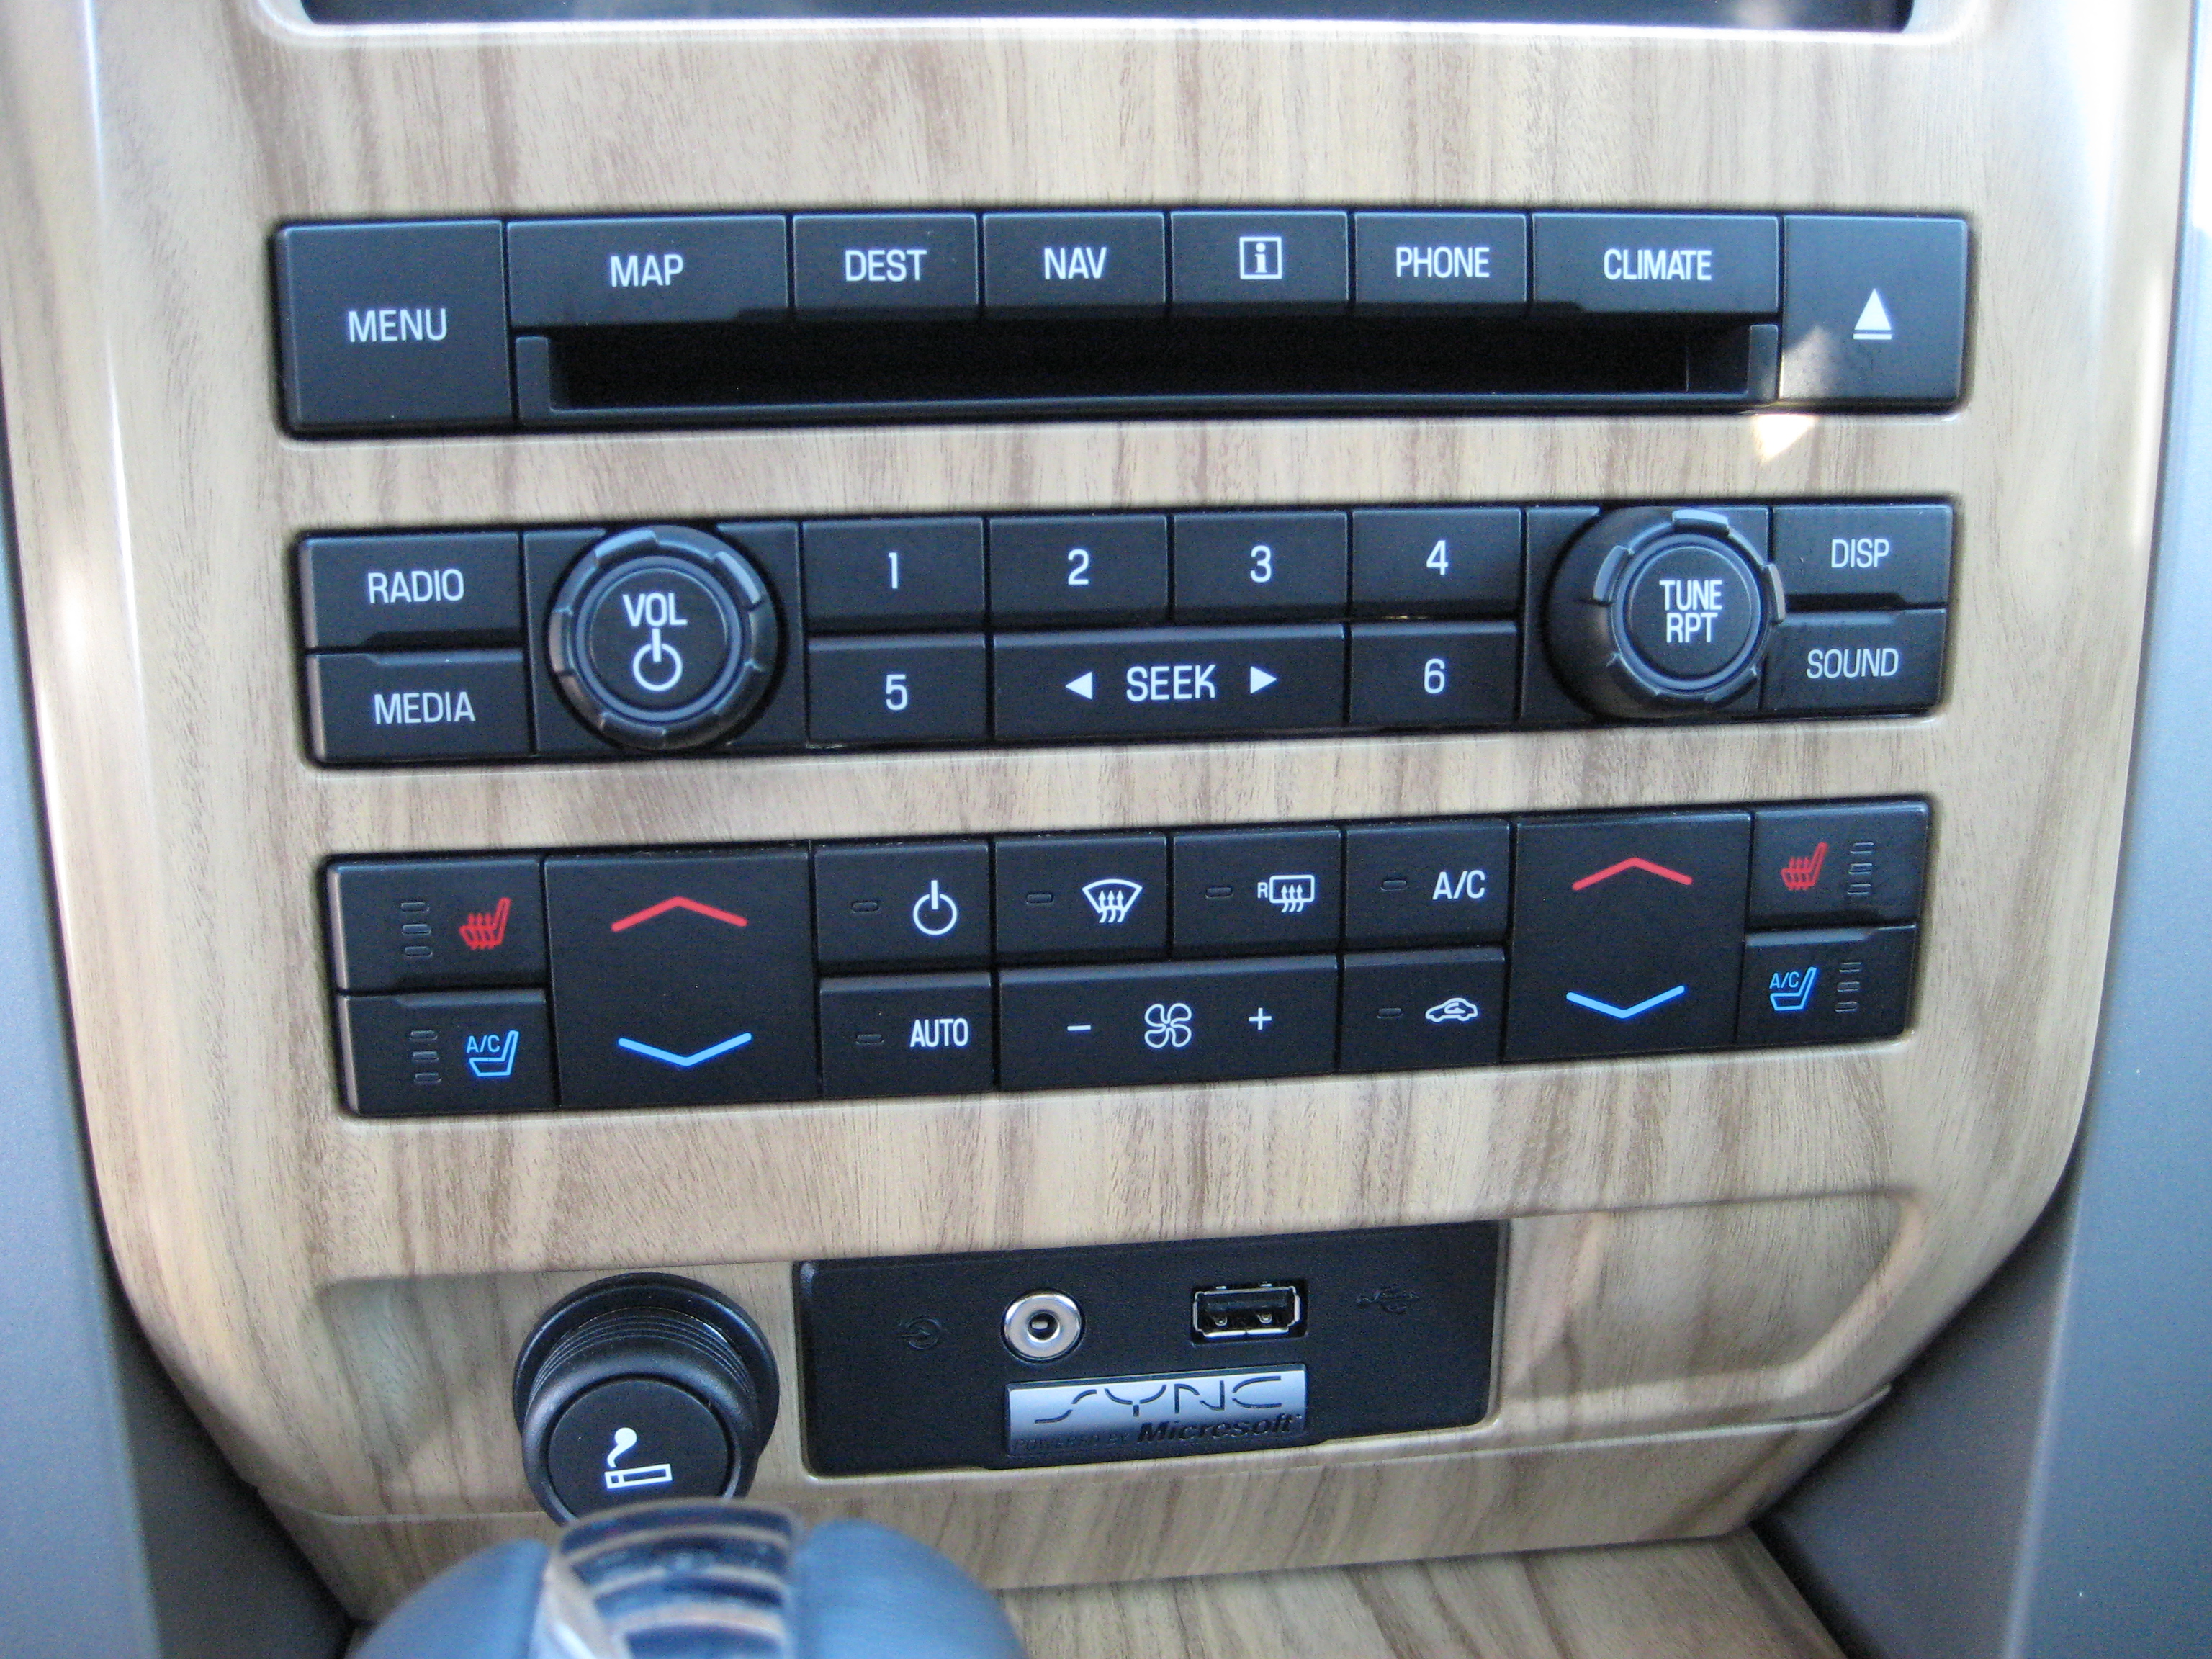
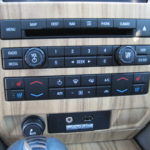 14,675 – $0.00 – The rear defrost quit on me, or so I thought. I brought the truck in for the oil change and to have the rear defrost checked out. The technician diagnosed the problem as a faulty LED in the HVAC Command Module, which includes all of the HVAC settings, as well as heated/cooled seat buttons. The parts finally came in a few days prior to this post, but the replacement won’t be installed until after this is published. (Picture to the right shows the HVAC module, directly below the radio controls)
Summary:
This was a fun quarter for my F-150. Not only did it see a 700+ mile road trip, but it hauled almost 3,000 lbs of stone (in multiple trips, naturally) for the creation of a walkway around the side of my house. In addition to that, it received another accessory, this time AVS Vent Visors. Through much research, I came to the conclusion that the in-channel visors would most likely cause the “pinch” sensors to activate when using the Auto-Up feature, and cause the windows to be lowered again. Because of this, I went with the stick-on ones, which I received for Christmas. Finally, in early April, the temperature was in the 70s for a few consecutive days, so I felt comfortable installing them. A few tips when installing stick-on vent visors:
- Wait for a few consecutive warm days (70+ degrees) – this allows the adhesive to better adhere to your vehicle.
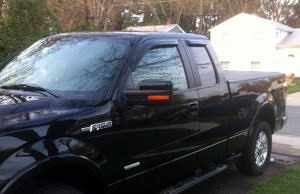
Vent Visors installed on the 2011 Ford F-150 - Take your time, and only peel up the edges of the tape covering (red, in my case), to get a test fit before the final application.
- Wash and dry your vehicle before beginning, and use the supplied alcohol wipes to get a good, clean surface for the tape to grab on to.
- Let the vehicle sit for several hours after installation, for the tape to really take hold.
Dated Notes:
- 3/25/2013 – Rear defrost doesn’t seem to work, second day in a row. Research on internet forums reveals that it’s usually caused by a bad in-glass element (in the rear window), or simply the sliding rear window not working. Opened and closed the rear window, rear defrost worked for two days, then nothing.
- none
by John Suit